Friday, November 18, 2016

Sewing a holiday wardrobe. Well, a holiday dress!

When I spotted this knit rayon on the "marked down" table at Spotlight I immediately loved the colours and know what I wanted to do with it - a pillowcase maxi. Specifically a pillowcase maxi to wear on a trip to Fiji. Something that was soft and cool and packed well.

There are a number of tutorials on the web - I followed this one and this one. Naturally I had to complicate things by only sewing one side seam. Accordingly I had to cut then bind the other armhole (otherwise you'd just end the seam below your armpit, as you do on the seamed side).

Ever since Meggipeg mentioned it in her blog, I've been paranoid about pattern placement , so I knew I had to offset the pattern so as not to inadvertently lead the eye when you don't want it led (ie don't place a blossom smack bang over a breast - unless that's your thing, of course!). I hope I got it right:


And I found a hat to match!

Sunday, October 30, 2016

Halloween Skeleton Gingerbread

How to decorate gingerbread people as skeletons for Halloween. In two speeds. Mini gingerbread person cutter and royal icing used. Recipes are easy enough to find on the internet. My piping bag was a zip lock bag with the corner snipped off; this gives you control over the size of your piping.

First, if you are pressed for time:
The process in more detail:

Tuesday, August 23, 2016

Monkey Magic Yoga Pants

How fortuitous that I enrol in yoga and Spoonflower launches its sports lycra fabric.
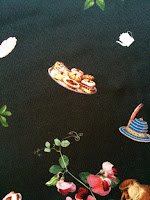
And how fabulous is the Monkey World fabric design? See for yourself (please click on each photo to experience it in screen-filling glory):


The fabric design rewards close inspection, with delightful details:

Floating plates of cakes, blue shoes, cake stands and a gilded box.


Thank you to Meggipegg who lent me her Megan Nielsen leggings pattern.

It's funny how you go to so much trouble with pattern placement on the front and sides, only to realise when you've sewn them up that you have double monkey butt.

Friday, May 27, 2016

Mini Pecan Pies

When you really want pecan pies but want small ones!

Choose a shortcrust pastry recipe. I tried Delia Smith's (lard and all) and Smitten Kitchen's (scroll down to "A Great Savory Tart Shell"). They both work. Delia's is more economical, without the egg, and can be made with all butter instead of butter and lard. I made a couple of pans of mini cases; once I rolled out the pastry straight away, cut and fitted it into the pans, then rested it before baking. The next time I rested the pastry first, then rolled and cut it. The second method was slightly more effective.

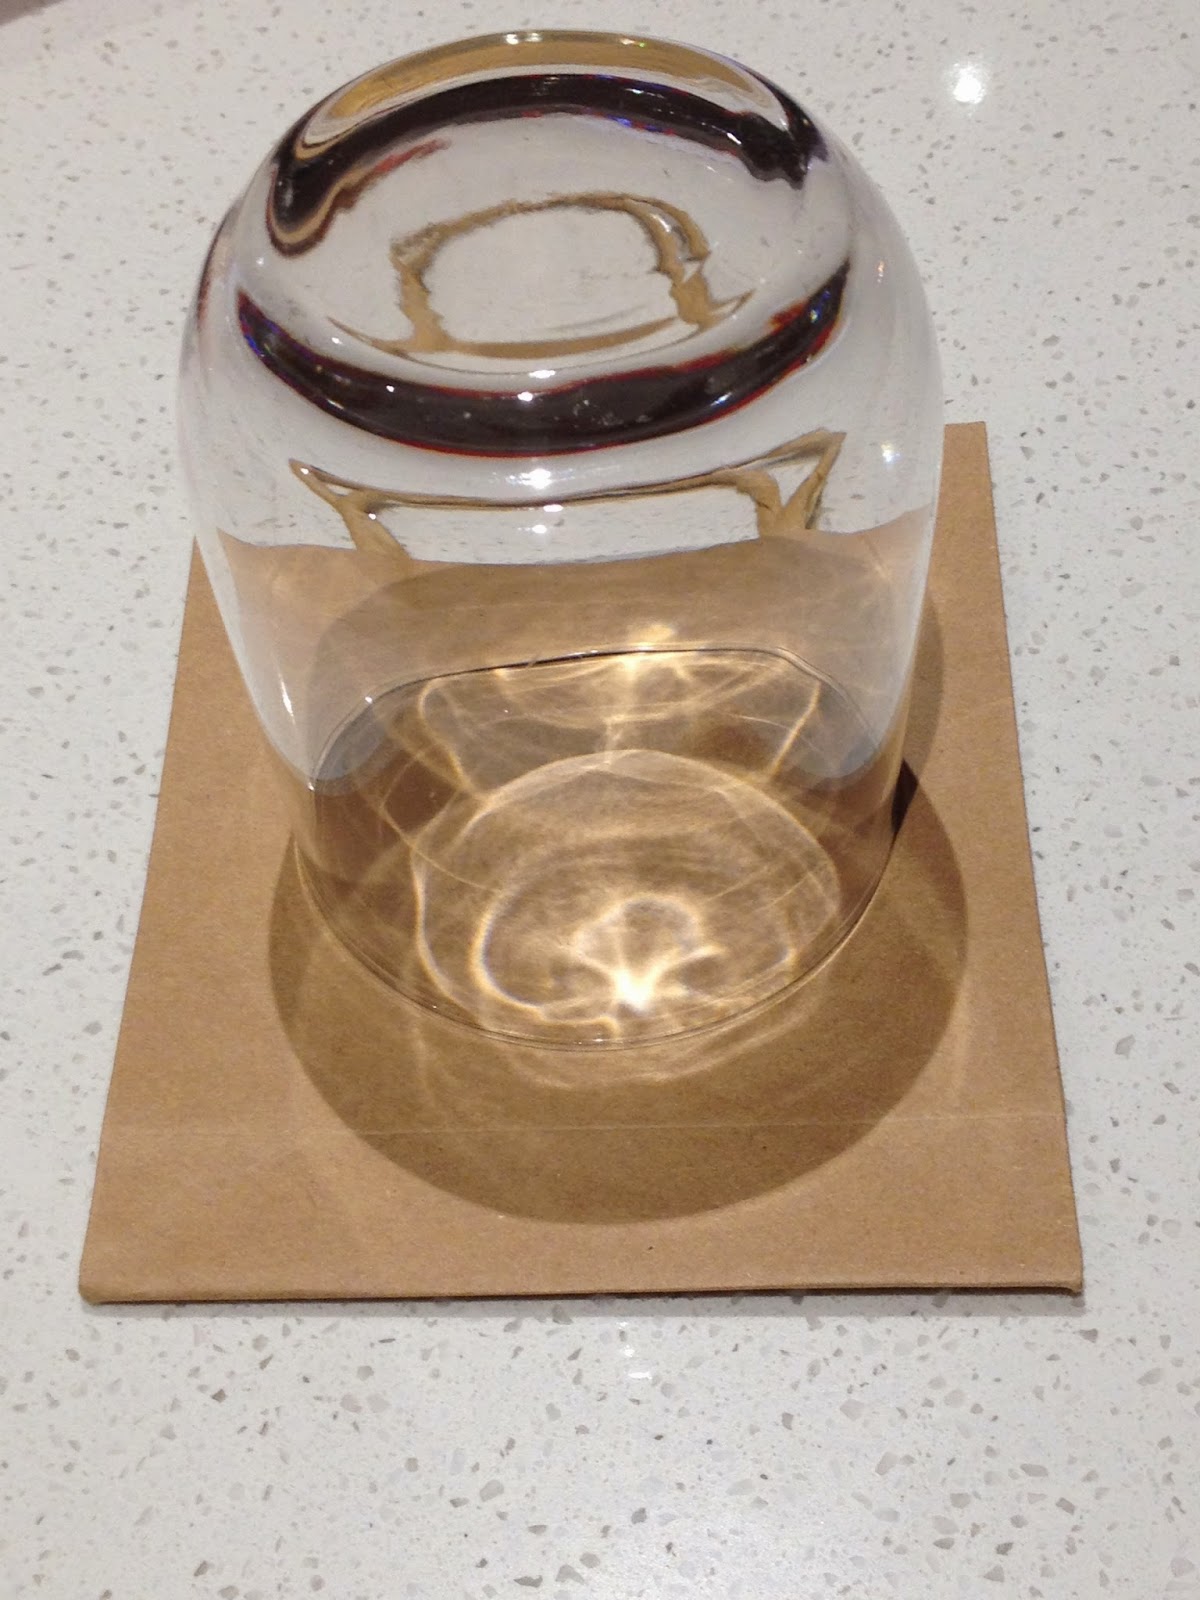
Use a a mini muffin pan to bake the mini pie shells. Don't have the right sized pastry cutter? Use a glass. Pick one with a rim slightly wider than the size of the mini muffin pan:


The pastry cases spent a week in the freezer before being filled and baked again. Don't bake them too well the first time - leave them very pale:

I used a recipe from taste.com.au for the filling, but as I was filling much smaller pastry cases, I made less filling. For 24 pastry cases you will only need:

17g unsalted butter, chopped
50g brown sugar
50ml golden syrup
1 egg, lightly beaten
1/4 teaspoon vanilla extract
80g pecan halves

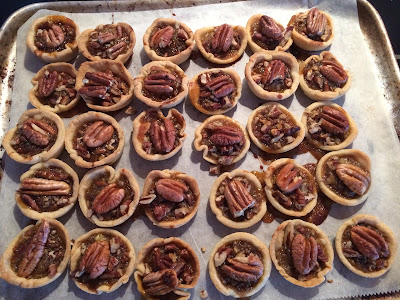
Fill cases with nuts, top with melted and mixed filling, and bake for no more than 10 minutes in a 180 degree oven:


Friday, March 18, 2016

Birthday card for a Star Wars Fan

I'd seen these on the interwebs and thought it would be fun to try. I used cardboard, my printer, and a short (bracelet length) glowstick. I set up the text and the lightsabre hilt (copied online) in Photoshop, printed and folded the card, cut a slot for the glowstick, and fastened it in place with stickytape.

Ta da! (Photos taken in the light and at night for full effect.)

Tuesday, September 22, 2015

Pyjamas for a Hunger Games Fan

Loving Spoonflower!

What you can find! And if you can't find it you can design it yourself.


The designs are based on the cover art for the Hunger Games stories. Perhaps that's why you can't find the fabric on Spoonflower anymore! The nearest I could find was this.

So, lucky we got it when we did.


Thursday, May 21, 2015

Home made raffle tickets

I tend to think people who sew can turn their hand to pretty much anything - and turn their sewing machine to pretty much anything too.... like creating perforations in raffle tickets.


I used the online TicketMaker programme to create the tickets. One word of advice - it's much easier to remove fields from the template than to add them, so try to make your data fit in the existing template rather than muck around with it too much.

Once printed (8 per A4 size), I ran the pages of tickets through the sewing machine (about 6 pages at a time - how many you can perforate depends on the strength of your sewing machine), before cutting and collating.

A book of 5 tickets was sent home with each family at the school, with the request that they buy or sell the tickets at $1 each ($5 for the book of tickets), or return the tickets. Naturally most families just sent back the cash and the ticket stubs, and waited for their number to be drawn.

Usually we would only sell tickets on the night of our markets, and maybe make $100. We made over $500 on this raffle.

There are always local laws pertaining to the running of raffles - licenses are usually required unless the raffle is limited in scope (eg just run within a community group), limited in time (just sold at one venue on one night) or limited in prize value. We kept our prize value below the local gaming law $200 ceiling that enabled us to run the raffle over a week and beyond our local community.

Compare and Contrast - a review of three online ticketing sites in Australia


School disco action.
This is for Australian readers of my blog who may be involved in organisations that have to run events for fundraising - or just run ticketed events, or any event where you have to keep track of who has paid and how much money you have made. Updated in 2017 to reflect a change in Sticky Ticket's pricing policy.

Having been involved in a few functions for my school's P&C, I think that one of the most labour intensive parts of any function is ticketing, where you can't just directly sell tickets but have to send home information about how to purchase tickets remotely. From the flyer (designing, printing, sorting, distributing) to the tickets (designing, printing, colating, cutting) to receipt of cash and completed forms (money getting lost on way, wrongly completed forms with illegible names etc), or matching forms to bank deposits (snore!), then distributing tickets (cross matching deposits and cash with names, physically distributing ticket) to getting tickets from children into parents' hands ("Hello, we paid, but don't have tickets? What do we do?"), to depositing cash at the bank... it's a hassle.

Using an online site, it will cost a little bit of money on top of the ticket price, but when you are in a situation where volunteers with time to do the ticketing function are short on the ground, it's a way of equitably sharing the "cost" (in $ rather than time). 

There are 3 online ticketing sites I have investigated:

1. Eventbrite
2. StickyTickets and
3. TryBooking

Each site will allow credit card payments, and will tabulate ticket purchase details, including details of purchaser (so you can have a contact name for each ticket sold). (As I typed all this I wished I knew Excel and I could plug all the figures into a spreadsheet which would calculate the on-costs of any price ticket....)

Here are the prices for comparison:
Eventbrite
http://help.eventbrite.com.au/customer/en_au/portal/articles/428604

Eventbrite charges 2.5% of the ticket price plus AU$0.99 per ticket, plus a 3.5% payment processing fee in Australian dollars. Pay with Visa, Mastercard or PayPal. Can absorb or pass on costs (although can't absorb PayPal costs) or chose to absorb some and pass on some.

A $10 ticket will therefore cost $10 x 2.5% = $10.25 + 99c = $11.24 + ($11.24 x 3.5% = 39c) = $11.63 (or, if you absorb the costs, the organiser collects only $8.37).
(Calculations for $20 ticket - $20 x 2.5% = $20.50 + 99c = 21.49 + (21.49 x 3.5% = .75c) = $22.24 [Or organiser collects $17.76 if they absorb all the costs.])

There's a suggestion that not for profit organisations could get it for less -  "If your organization is recognized by the government as a nonprofit, you can apply for lowers fees on your events." - http://help.eventbrite.com.au/customer/en_au/portal/articles/428887-can-my-charity-get-lower-fees-for-our-events-

but the terms "non profit" and "charitable" are used interchangeably - and they are not the same thing - so it is not entirely clear which organisations will qualify (eg our P&C is a not-for-profit organisation, not a charitable organisation).


StickyTickets

The site offers a flat fee of $1 for ticket sales up to $9.99 and $1.50  for tickets up to $24.99 (you can see the full fee structure as well as a calculator of fees on the link above.) You can decide whether to absorb this cost in your ticket pricing or pass it on to the purchaser. The site accepts Visa and Mastercard, but charges more for AMEX. No PayPal.

So for a ticket up to $10, you could charge an extra $1 to the ticket price to cover the booking fee, or you could absorb the fee in your ticket price. 

(A $20 ticket - $21.50)

In addition, they offer a 10% rebate of fees charged for "not for profits", as well as rebates for educational institutions, not for profit/community groups and 20% rebates for charities and events held in order to fundraise for registered charities. (https://www.stickytickets.com.au/community-clubs-ticketing-rebate)

TryBooking
http://www.trybooking.com/html/pricing.shtml

Different structure again - 30c per ticket cost for purchasers (which the organiser could absorb by dropping the ticket price by 30c), then organisers get charged a percentage fee plus a fee per transaction - not per ticket! So may work out more cost effective:

For a $10 ticket, the purchaser will pay $10.30 ($10 + 30c). The organiser is charged 2.1% of $10 = 21c + 50c per transaction - so the organiser collects ($10 - 71c) $9.29. Only Visa and Mastercard credit card payments; Amex attracts extra fees.

(For a $20 ticket, organiser collects $20 - [2.1% of $20 = 42c + 50c] = $19.08.)

Any way you dice it, TryBooking would seem to be the most cost effective site. Interestingly, it is used by two public schools in Perth - both Perth Modern School and John Curtin Senior High School - for ticket sales to their performances, so the site must be safe and secure.

Always be upfront, though, about whether you are passing on booking fees or not. I hate to see event advertised at "$25" but then once booking fees are added it's closer to a $30 ticket price!

Monday, May 4, 2015

Shoes for a Hunger Games fan


Thomas had seen an art show on TV in which they personalised plain canvas sneakers. Then we were in Target and saw this (Cue "Mu-umm?!?"):


Next, images were printed from the internet and stencils were cut from Contact adhesive plastic (good for stencils as it sticks to fabric and helps prevent bleeding a little).

 Stick on the stencil, mask the rest of the shoe.


Spray paint. Or sponge on fabric paint. Whatever you have.
Embellish with "puffy paint" (and touch up with a black marker).


Wear with pride.


Tuesday, December 2, 2014

This year's Christmas effort

Nothing like killing three (3!) birds with one stone - Christmas tree, advent calendar and a lesson in Roman numerals:


The "advent bags" are paper bags purchased from a craft store. I printed labels with Roman numerals using my printer and big maths brain. The ribbons tying the bags on had been sewn on the tree last year. Astute readers will notice there are not the traditional 24 advent bags. This is because the craft store ran out of bags, and craft stores in Perth, Western Australia, are few and far between. Thanks to the mining boom, I can buy a diamond ring at the end of my street but not craft supplies! I'll put some bags to double use by putting a number on the back and turning it over after re-filling it.

How did I ensure the number was centred on my cut-out? Easy - use a template you can see through (a glass):

First, check the cut out will fit on what you are gluing it to.

Next, ensure you place the glass evenly over the printed part of the page.


How did it go down?