Showing posts with label Paper Craft. Show all posts

Sunday, August 12, 2018

Stranger Things birthday card

Image result for demogorgon popMr 14 was off to a teen birthday party and noted that he and some others were going to make handmade cards for the birthday girl ... and see whose she liked best! Challenge accepted! All I know was that she liked Stranger Things. So what else but a pop up Demogorgon card. Just what every girl wants.

I googled "pop up flower card" and followed the instructions to create 7 flowers for the most common flower pop-up card you will find on the net. I printed a A4 page of a "Stranger Things" wallpaper for most of the "flowers" but created an 8-petal flower using Photoshop and this image to create the "petals" for the demogorgon:

The pop up 7-flower cards use an 8-petalled flower from which one petal is removed, and then two petals are overlapped, resulting in a 6-petalled flower. So my demogorgon ended up with 6 "petals" (flanges?) instead of the 5 as pictured. But who's counting?

The other 6 flowers I cut from the Stranger Things wallpaper.

If you make each flower from a 3 inch square, the whole "pop up" arrangement will fit in a traditionally sized greeting card - 4 x 6 inches (A6 envelope size). BUT make your demogorgon from a 4 x 4 inch square so it standout out more.

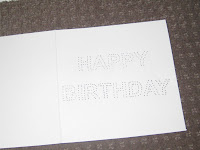
Finally, a search for "Stranger things" font led me to the Stranger Things Type Generator from which I produced a "Happy Birthday" in the Stranger Things style. Simply download or screenshot, print, cut, paste to front of card:

And voila!


Friday, March 18, 2016

Birthday card for a Star Wars Fan

I'd seen these on the interwebs and thought it would be fun to try. I used cardboard, my printer, and a short (bracelet length) glowstick. I set up the text and the lightsabre hilt (copied online) in Photoshop, printed and folded the card, cut a slot for the glowstick, and fastened it in place with stickytape.

Ta da! (Photos taken in the light and at night for full effect.)

Thursday, May 21, 2015

Home made raffle tickets

I tend to think people who sew can turn their hand to pretty much anything - and turn their sewing machine to pretty much anything too.... like creating perforations in raffle tickets.


I used the online TicketMaker programme to create the tickets. One word of advice - it's much easier to remove fields from the template than to add them, so try to make your data fit in the existing template rather than muck around with it too much.

Once printed (8 per A4 size), I ran the pages of tickets through the sewing machine (about 6 pages at a time - how many you can perforate depends on the strength of your sewing machine), before cutting and collating.

A book of 5 tickets was sent home with each family at the school, with the request that they buy or sell the tickets at $1 each ($5 for the book of tickets), or return the tickets. Naturally most families just sent back the cash and the ticket stubs, and waited for their number to be drawn.

Usually we would only sell tickets on the night of our markets, and maybe make $100. We made over $500 on this raffle.

There are always local laws pertaining to the running of raffles - licenses are usually required unless the raffle is limited in scope (eg just run within a community group), limited in time (just sold at one venue on one night) or limited in prize value. We kept our prize value below the local gaming law $200 ceiling that enabled us to run the raffle over a week and beyond our local community.

Wednesday, December 4, 2013

Is it that time again already?

A few months ago I went to the warehouse sale of a paper merchant in Perth, Western Australia, and, thinking ahead, bought a pack of 100 of these: (die cut Christmas Tree cards)

I probably wont use all 100 of them, so I decided to share my bounty via eBay. And next week the school is having a Christmas Market, and I thought I could sell some more, but maybe I should make up a few as examples of what you can do with them - hence:


 I also have lots of marbled paper left over from exercises such as this, which I (or you!) could use.

Tuesday, October 8, 2013

Not so mini mini-figure!

This is what I started a little while ago....

I took some coloured cardboard...

And some leftover packaging boxes, and made a not-so-mini-minifigure. Not sure what his role at Austin's Lego Party will be exactly...

Tuesday, October 1, 2013

Back to the Lego Party

Turns out July wasn't too soon to start the party - I should have started A LOT earlier! Thanks to the school's Art Exhibition and Auction, things got set back a little. But we are back on track - with the invitations going out.

Thanks to All for the Memories for their great Lego invitation template. I downloaded it and adapted it - and here it is:


Monday, September 23, 2013

Collaborative art project for older primary children

The great thing about children is that they by and large get more dextrous the older they get. So when you get a class full of 11 and 12 year olds (and mostly boys as their female classmates are all off at a choir performance) and you need to give them something to do that will keep their hands and minds occupied origami comes to mind. And given that the school's "language other than English" is Japanese, everyone was happy to go along for the ride.

And then someone showed me the work of Will and Caro:


and I knew what to do with all the butterflies we made:
I used these instructions:

Sunday, September 22, 2013

Primary school Art Show fun

Many schools have hit upon the idea of getting students to produce collaborative artworks then pitting parents of those students to bid against each other to take the work home, proceeds going to the school (via the P and C). So it is at my sons' present school as it was at the last.

Not every class at the present school had a parent put up their hand to help in their class, so I ended up helping a few classes make collaborative works. Some classes had more input from students than others. This was one idea which is pretty basic but produced a work that sold at auction for $210 - and cost about $25 to put together (the cost of the frame, paper, and a new cutting knife).

I've always admired Australian artist Rosalie Gascoigne's work - especially the yellow and black works made with old packing boxes, or, here, road signs:
And currently there's "textual" fashion in art - using words to create artworks. I combined the two by getting the class of first years (5-6 year olds) to go through junk mail catalogues and magazines and pick out yellow pictures, and cut them out for me. You start with this:

And then, some sticking and cutting (words printed from computer and traced onto heavier card) later, you end with this:

There are many similar projects out there - here are some others for inspiration:
1. 2. 3.

Wednesday, January 30, 2013

More inspired card making

After seeing this, at Next to Nicx's inspiring blog:


I knew I had the perfect idea for my Dad's birthday card. And here's how it turned out:


I didn't use Next to Nicx's template as it didn't print correctly for me. Instead I just printed text onto paper (making sure it was the right size for the card I had), put the printing over the card, and made holes through the paper and the card with a needle. I was lucky I had a carpet sample stuck on cardboard as the ideal surface to work on. (Although if you think the lines of text aren't quite level, that's either a trick of the eye, or the fact that I was doing it on my lap, sitting on a bed with two active children. Because when you are living in a one bedroom house with two children, things are bound to slip.) I then started embroidering. I didn't have embroidery thread (like 99% of my possessions, it's in storage), so I used sewing machine cotton, doubled over. And yes, it did take hours. But my Dad liked it!


Wednesday, May 23, 2012

All I needed was a little inspiration

Yes, been a while since I've been here. But inspired by How About Orange's origami dress card (right), and a book on marbling paper being discarded by the local library (and full of full colour plates of marbled effects), I whipped these up:


(I think I could learn something from How About Orange's photo styling.....)


Sunday, November 27, 2011

Cardmaking with Vintage Papercuts


See Vintage Papercuts for details of how to purchase.

Sunday, September 11, 2011

Austin's Gruffalo birthday party - the games

Well, there was really only one game (apart from "Mouse Mouse Gruffalo", a version of "Duck Duck Goose"), and that was "Stick the Wart on the Gruffalo's Nose"!  I printed a picture of the Gruffalo's head onto two A4 sheets of paper and stuck them together. Then I bought some green stickers and cut them into wart shapes (you could use dots, but I couldn't find any poisonous green ones in time). I wrote the guest's names on the stickers too, so we knew who stuck what, where!


Even the Gruffalo got into the game!


To download the poster from a Google Docs site (works best if you are a gmail user) (printable on 2 x A4 pages), click here (documents called "Stickthewart").

Or, right click on these thumbnails to open in a new window and print them:

Saturday, June 18, 2011

Baby bunting

Two months, 3 friends, 4 (four) baby boys! Congratulations to Susan, Tina and Caroline. I made each of you a card:
(Spot the two little onesies, above?)

Sunday, May 22, 2011

Isabella's birthday present

Isabella's Mum Jean mentioned that Isabella would love a papercut of a bird in a cage, as seen here. So I made her one.


Thursday, March 24, 2011

A little something on the side

It's not that I haven't been busy, I've just been elsewhere - at Vintage Papercuts. Please come and visit, or see you at our market stall on Saturday 26 March 2011 at Greenwich Public School, 32 Kingslangley Road Greenwich.